Remote access to a Raspberry Pi can revolutionize the way you manage your devices, enabling you to control your projects from anywhere in the world. Whether you're a hobbyist, developer, or professional, learning how to perform a free remote login to Raspberry Pi is an essential skill. In this article, we'll delve into the nuances of remote access, providing you with step-by-step guidance and expert advice.
As more people rely on remote work and IoT (Internet of Things) solutions, the ability to connect to your Raspberry Pi remotely becomes increasingly valuable. This guide will explore various methods and tools that allow you to achieve this without incurring any costs. You’ll discover how to set up secure connections, troubleshoot common issues, and optimize your setup for seamless performance.
Our focus is not only on explaining the technical aspects but also ensuring that you understand the importance of security when enabling remote access. By the end of this article, you’ll have the knowledge and confidence to configure your Raspberry Pi for remote login safely and efficiently.
Read also:Kannada Movierulz Com 2024 Your Ultimate Guide To Kannada Movies Online
Table of Contents
- Introduction to Remote Login
- Why Free Remote Login to Raspberry Pi Matters
- Setting Up SSH for Remote Login
- Using SSH to Access Raspberry Pi
- Establishing a VNC Connection
- Exploring Cloud-Based Solutions
- Security Tips for Remote Access
- Common Issues and Troubleshooting
- Alternative Methods for Remote Login
- Conclusion and Next Steps
Introduction to Remote Login
Remote login to Raspberry Pi opens up countless possibilities for users who wish to manage their devices from afar. The Raspberry Pi, a versatile single-board computer, has become a favorite among tech enthusiasts due to its affordability and flexibility. However, its true potential is unlocked when you can access it remotely without being physically present.
There are several ways to achieve this, ranging from simple command-line interfaces to graphical user interfaces. Each method comes with its own set of advantages and challenges. In this section, we'll outline the basics of remote access and why it's an indispensable tool for modern users.
Benefits of Remote Access
Some of the key benefits include:
- Efficient project management
- Increased flexibility in work environments
- Reduced downtime for troubleshooting
- Enhanced productivity for developers and hobbyists
Why Free Remote Login to Raspberry Pi Matters
In today's digital age, free remote access to Raspberry Pi is more relevant than ever. Many users are hesitant to invest in paid solutions when there are reliable and cost-effective alternatives available. By leveraging free tools and services, you can enjoy the same level of functionality without breaking the bank.
This section will explore why opting for free solutions is not only cost-efficient but also practical for most users. We'll also touch on the importance of choosing tools that align with your technical expertise and project requirements.
Setting Up SSH for Remote Login
SSH (Secure Shell) is one of the most popular methods for remote login to Raspberry Pi. It provides a secure and encrypted connection, ensuring that your data remains protected during transmission.
Read also:Comprehensive Remoteiot Vpc Tutorial Your Ultimate Guide
Steps to Enable SSH on Raspberry Pi
- Access the Raspberry Pi Configuration tool by typing
sudo raspi-configin the terminal. - Navigate to the "Interfacing Options" menu and select "SSH."
- Choose "Yes" to enable SSH and then reboot your device.
Once SSH is enabled, you can use any SSH client to connect to your Raspberry Pi from another computer. This process is straightforward and requires minimal technical knowledge.
Using SSH to Access Raspberry Pi
With SSH enabled, the next step is to establish a connection to your Raspberry Pi. You'll need the IP address of your device, which can be found using the command hostname -I in the terminal.
Connecting via SSH
Follow these steps to connect:
- Open an SSH client such as PuTTY (Windows) or Terminal (Mac/Linux).
- Enter the IP address of your Raspberry Pi in the hostname field.
- Log in using the default credentials (pi/raspberry) or your custom username and password.
Once connected, you'll have full access to your Raspberry Pi's command-line interface, allowing you to manage files, run scripts, and perform other administrative tasks.
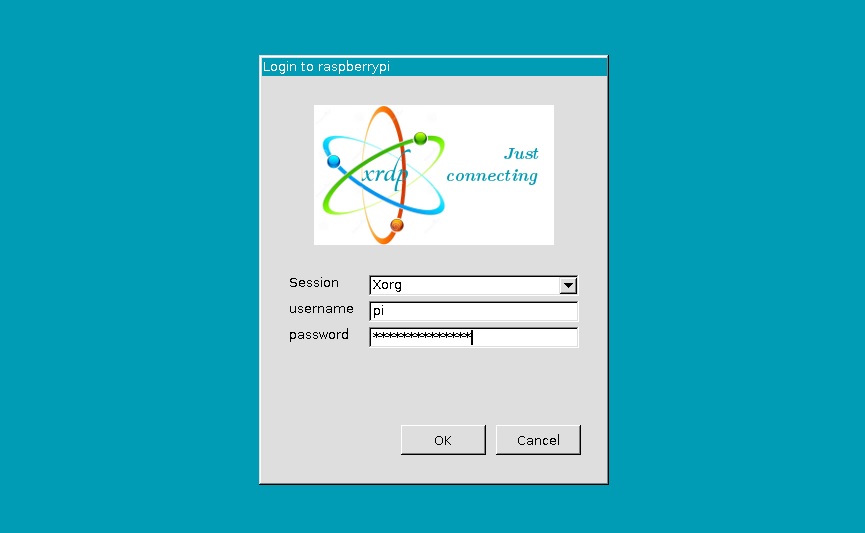
Establishing a VNC Connection
While SSH is ideal for command-line operations, some users prefer a graphical interface for more complex tasks. VNC (Virtual Network Computing) enables you to access the desktop environment of your Raspberry Pi remotely.
Installing and Configuring VNC
Here's how you can set up VNC on your Raspberry Pi:
- Install the VNC server by typing
sudo apt-get install realvnc-vnc-serverin the terminal. - Enable VNC through the Raspberry Pi Configuration tool.
- Download the VNC Viewer application on your client device.
- Connect to your Raspberry Pi using its IP address and login credentials.
VNC offers a more user-friendly experience, making it an excellent choice for beginners or those who require a graphical interface for their projects.
Exploring Cloud-Based Solutions
For users who need remote access from anywhere in the world, cloud-based solutions can be a game-changer. Platforms like ngrok and PageKite allow you to expose your Raspberry Pi to the internet temporarily, enabling remote login without the need for complex network configurations.
Advantages of Cloud-Based Tools
- No need for port forwarding or static IP addresses
- Easy setup and minimal configuration required
- Accessible from any device with an internet connection
However, it's crucial to weigh the pros and cons of these solutions and consider their impact on security and privacy.
Security Tips for Remote Access
Security should always be a top priority when setting up remote access to your Raspberry Pi. Here are some best practices to keep your device safe:
- Change the default username and password to something unique and complex.
- Use SSH keys instead of passwords for authentication.
- Disable root login and restrict access to specific IP addresses if possible.
- Regularly update your Raspberry Pi's operating system and software.
By following these guidelines, you can significantly reduce the risk of unauthorized access and protect your data from potential threats.
Common Issues and Troubleshooting
Even with careful planning, issues can arise when setting up remote access to your Raspberry Pi. Here are some common problems and their solutions:
Problem: Unable to Connect via SSH
Possible causes include:
- SSH not enabled on the Raspberry Pi
- Incorrect IP address or hostname
- Firewall blocking the connection
To resolve this, double-check your settings and ensure that all necessary ports are open. Restarting your Raspberry Pi and client device can also help in some cases.
Alternative Methods for Remote Login
While SSH and VNC are the most widely used methods for remote access, there are other options worth exploring:
TeamViewer
TeamViewer is a popular remote desktop application that supports Raspberry Pi. It offers a user-friendly interface and robust security features, making it an excellent choice for those who prefer a more polished experience.
Web-Based Interfaces
Some users opt for web-based interfaces such as PiWebAdmin, which allows you to manage your Raspberry Pi through a browser. This method eliminates the need for additional software installations and provides a convenient way to access your device from any platform.
Conclusion and Next Steps
In conclusion, free remote login to Raspberry Pi is a powerful tool that can enhance your workflow and expand the capabilities of your projects. By following the steps outlined in this guide, you can set up secure and efficient remote access using SSH, VNC, or other methods.
We encourage you to experiment with different tools and techniques to find the best solution for your needs. Don't forget to prioritize security and regularly update your system to protect against potential threats.
Feel free to leave a comment below if you have any questions or suggestions. Share this article with others who may find it useful, and explore our other resources for more tips and tutorials on Raspberry Pi and related technologies.
Data Sources: