RemoteIoT VPC network configuration on Raspberry Pi is becoming increasingly popular among tech enthusiasts and professionals alike. As more people embrace the Internet of Things (IoT), the ability to manage and configure virtual private cloud (VPC) networks remotely using a Raspberry Pi has become a sought-after skill. This guide will walk you through the process step by step, ensuring you have all the tools and knowledge necessary to set up your own remote IoT VPC network.
In today's fast-paced digital world, IoT devices are revolutionizing industries and households. From smart home appliances to industrial automation, the demand for secure, scalable, and remote-accessible networks continues to grow. By leveraging the Raspberry Pi as a low-cost yet powerful device, users can create robust VPC networks that allow seamless communication between IoT devices.
This comprehensive guide will not only cover the technical aspects of setting up a RemoteIoT VPC network but also provide practical tips, troubleshooting advice, and free resources to download. Whether you're a beginner or an advanced user, this article is designed to cater to your needs and help you master the art of remote IoT networking.
Read also:The Richest Person In Kenya 2025 Unveiling Wealth And Influence
Table of Contents
- Introduction to RemoteIoT VPC Network
- Raspberry Pi Overview
- Why Use VPC for IoT?
- Setting Up VPC Network
- Connecting IoT Devices
- Security Best Practices
- Troubleshooting Tips
- Free Resources for Download
- Case Studies
- Conclusion
Introduction to RemoteIoT VPC Network
A RemoteIoT VPC network is essentially a virtual private cloud designed to connect and manage IoT devices from a remote location. This setup allows users to control and monitor their IoT devices securely without being physically present. The Raspberry Pi plays a crucial role in this setup due to its versatility and affordability.
By integrating the Raspberry Pi with cloud services like AWS, users can create a scalable and secure network that supports multiple IoT devices. This configuration is ideal for both personal and professional use, offering flexibility and reliability.
One of the key benefits of using a VPC network is enhanced security. By isolating IoT devices within a private network, users can protect sensitive data and prevent unauthorized access. Additionally, VPC networks offer better control over network traffic, ensuring optimal performance and reliability.
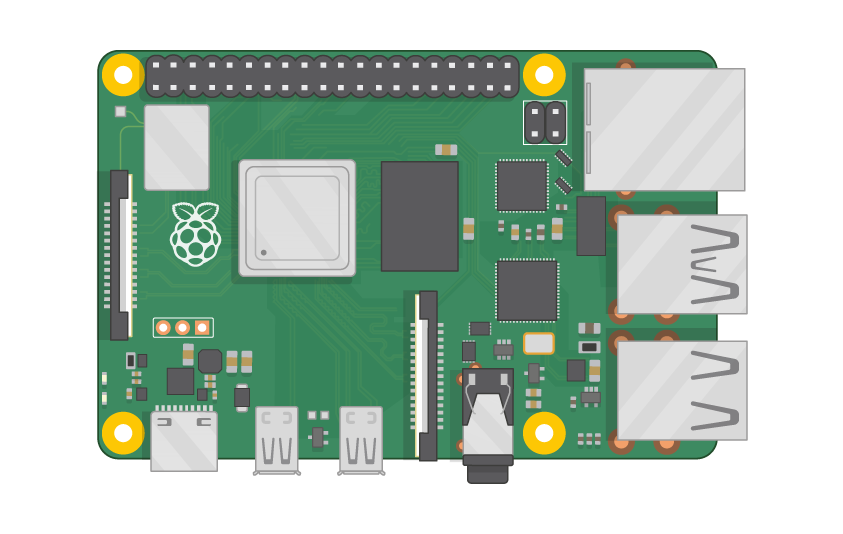
Raspberry Pi Overview
The Raspberry Pi is a credit-card-sized single-board computer that has gained immense popularity among hobbyists, educators, and professionals. Its affordability and versatility make it an ideal choice for various projects, including IoT and network configurations.
Key features of the Raspberry Pi include:
- Low power consumption
- Multiple GPIO pins for hardware interfacing
- Support for various operating systems, including Linux
- Built-in Wi-Fi and Bluetooth capabilities
For this guide, we recommend using the Raspberry Pi 4 Model B, as it offers improved performance and connectivity options compared to earlier models.
Read also:Movierulz 2023 Kannada The Ultimate Guide To Streaming And Downloading Movies
Why Use VPC for IoT?
Using a VPC network for IoT devices provides several advantages, including:
- Security: VPC networks offer enhanced security by isolating IoT devices from the public internet, reducing the risk of cyberattacks.
- Scalability: VPC networks can easily accommodate additional devices and services, making them suitable for growing IoT ecosystems.
- Flexibility: Users can customize network settings to meet their specific needs, ensuring optimal performance and functionality.
Moreover, VPC networks enable seamless integration with cloud services, allowing users to leverage advanced features like machine learning and data analytics for their IoT projects.
Setting Up VPC Network
Step 1: Prepare Raspberry Pi
Before setting up the VPC network, ensure your Raspberry Pi is properly configured. Follow these steps:
- Install the latest version of Raspberry Pi OS on your device.
- Connect your Raspberry Pi to a power source and a monitor.
- Update the system by running the following commands in the terminal:
sudo apt update
sudo apt upgrade
Once the system is updated, you can proceed to the next step.
Step 2: Install AWS CLI
To integrate your Raspberry Pi with AWS VPC services, you need to install the AWS Command Line Interface (CLI). Follow these steps:
- Download and install the AWS CLI by running the following command:
curl "https://awscli.amazonaws.com/awscli-exe-linux-x86_64.zip" -o "awscliv2.zip"
unzip awscliv2.zip
sudo ./aws/install
- Configure the AWS CLI by running the following command:
aws configure
Follow the prompts to enter your AWS access key, secret key, region, and output format.
Connecting IoT Devices
Once your VPC network is set up, you can start connecting IoT devices. Here are some tips to ensure a smooth connection process:
- Ensure all devices are compatible with the chosen network protocol (e.g., MQTT, HTTP).
- Use secure communication protocols to protect data transmitted between devices.
- Monitor device performance regularly to identify and resolve any issues promptly.
For example, if you're using MQTT for communication, you can install the Mosquitto broker on your Raspberry Pi and configure it to work with your VPC network.
Security Best Practices
Securing your RemoteIoT VPC network is crucial to protect sensitive data and prevent unauthorized access. Follow these best practices:
- Use strong, unique passwords for all devices and accounts.
- Enable two-factor authentication wherever possible.
- Regularly update firmware and software to patch security vulnerabilities.
Additionally, consider implementing network segmentation to isolate critical devices and reduce the attack surface.
Troubleshooting Tips
Even with careful planning, issues may arise during the setup process. Here are some common problems and their solutions:
- Connection Issues: Ensure all devices are properly configured and connected to the network. Check network settings and restart devices if necessary.
- Performance Problems: Monitor network traffic and optimize settings to improve performance. Consider upgrading hardware if needed.
- Security Alerts: Investigate any security alerts promptly and take appropriate action to address potential threats.
If you encounter persistent issues, consult the official documentation or seek assistance from online communities.
Free Resources for Download
To help you get started with your RemoteIoT VPC network, we have compiled a list of free resources:
These resources provide detailed information and tutorials to assist you in setting up and managing your network.
Case Studies
Here are a few real-world examples of how organizations have successfully implemented RemoteIoT VPC networks:
- Smart Agriculture: A farming company used a Raspberry Pi-based VPC network to monitor soil moisture levels and automate irrigation systems, resulting in improved crop yield and reduced water consumption.
- Industrial Automation: A manufacturing plant integrated IoT sensors with a VPC network to optimize production processes and reduce downtime.
These case studies highlight the versatility and potential of RemoteIoT VPC networks in various industries.
Conclusion
In conclusion, setting up a RemoteIoT VPC network using a Raspberry Pi is a powerful way to manage and control IoT devices remotely. By following the steps outlined in this guide, you can create a secure, scalable, and efficient network tailored to your specific needs.
We encourage you to share your experiences and insights in the comments section below. Additionally, feel free to explore other articles on our site for more tips and tutorials on IoT and network configurations. Happy building!