Secure Shell (SSH) is a powerful protocol that allows you to securely connect to remote servers and execute commands over an encrypted network connection. If you're a Mac user, learning how to use SSH remote on your device can significantly enhance your productivity and security when managing remote systems. Whether you're a developer, system administrator, or tech enthusiast, this guide will provide step-by-step instructions to help you set up SSH remote access for free.
In today's interconnected world, the ability to manage remote systems securely is more important than ever. With SSH, you can ensure that your data remains protected from unauthorized access while maintaining seamless access to remote servers. This guide is designed to provide you with a comprehensive understanding of SSH and how to implement it effectively on your Mac.
Whether you're new to SSH or looking to refine your skills, this article will cover everything you need to know about setting up SSH remote on Mac for free. From basic configurations to advanced tips, we'll ensure you have all the tools necessary to succeed.
Read also:Asher Grodman Actor A Rising Star In The Entertainment Industry
Table of Contents
- Introduction to SSH
- Why Use SSH on Mac?
- Setting Up SSH on Mac
- Generating SSH Keys
- Connecting to Remote Servers
- Securing Your SSH Connection
- Common SSH Commands
- Troubleshooting SSH Issues
- Advanced SSH Configurations
- Conclusion
Introduction to SSH
SSH, or Secure Shell, is a cryptographic network protocol used to establish secure connections between a client and a server. It is widely used by IT professionals to manage remote systems and execute commands over the internet. By encrypting data transmitted between devices, SSH ensures that sensitive information remains protected from unauthorized access.
How Does SSH Work?
SSH operates by creating an encrypted tunnel between the client and server. This tunnel secures the communication channel, making it nearly impossible for attackers to intercept or tamper with the data. The protocol supports various authentication methods, including password-based and public-key authentication, providing flexibility and security for users.
Benefits of Using SSH
- High-level encryption for secure data transmission
- Support for multiple authentication methods
- Compatibility with a wide range of operating systems
- Ability to manage remote systems efficiently
Why Use SSH on Mac?
MacOS comes equipped with built-in SSH capabilities, making it an ideal platform for users who need to manage remote servers. Whether you're a developer working on a Linux-based server or a system administrator overseeing a network of machines, SSH on Mac provides a powerful and efficient way to handle remote tasks.
Key Features of SSH on Mac
One of the standout features of SSH on Mac is its seamless integration with the Terminal application. This allows users to execute complex commands and scripts directly from their desktop, eliminating the need for third-party software. Additionally, MacOS supports advanced SSH configurations, enabling users to customize their setup according to specific requirements.
Setting Up SSH on Mac
Setting up SSH on Mac is a straightforward process that requires minimal technical expertise. Follow these steps to get started:
Step 1: Open Terminal
Launch the Terminal application on your Mac. You can find it in the Applications > Utilities folder or use Spotlight Search to locate it quickly.
Read also:How To Use Remote Manage Iot Over Internet On Mac The Ultimate Guide
Step 2: Verify SSH Installation
MacOS includes SSH by default. To confirm that SSH is installed, type the following command in Terminal:
ssh -V
This command will display the version of SSH installed on your system, confirming that it is ready for use.
Generating SSH Keys
Generating SSH keys is a crucial step in ensuring secure communication between your Mac and remote servers. Public-key authentication eliminates the need for passwords, enhancing security and convenience.
Creating SSH Keys
To generate SSH keys, follow these steps:
- Open Terminal and type the command:
ssh-keygen -t rsa -b 4096 -C "your_email@example.com" - Press Enter to accept the default file location.
- Enter a passphrase for added security (optional).
Adding SSH Keys to the SSH Agent
Once your keys are generated, add them to the SSH agent for seamless authentication:
eval "$(ssh-agent -s)"
ssh-add ~/.ssh/id_rsa
Connecting to Remote Servers
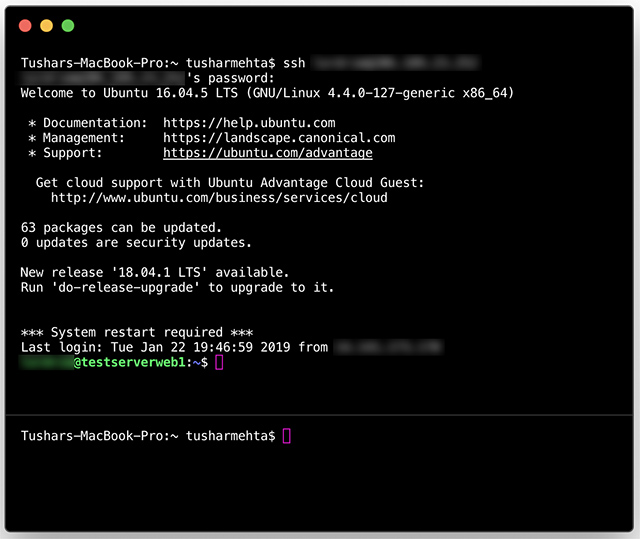
With SSH keys in place, you can now connect to remote servers securely. Use the following command to establish a connection:
ssh username@remote_server_address
Tips for Efficient Connections
- Use aliases in your SSH configuration file to simplify server addresses.
- Enable SSH compression for faster data transfer over slow networks.
- Set up port forwarding for secure access to internal services.
Securing Your SSH Connection
While SSH is inherently secure, additional measures can further enhance its protection. Consider implementing the following best practices:
Disable Password Authentication
Switch to public-key authentication only to prevent brute-force attacks. Edit the SSH configuration file (/etc/ssh/sshd_config) and set:
PasswordAuthentication no
Restrict Access by IP Address
Limit SSH access to specific IP addresses by configuring firewall rules or using the AllowUsers directive in the SSH configuration file.
Common SSH Commands
Familiarizing yourself with common SSH commands can streamline your workflow and improve efficiency. Below are some essential commands:
ssh username@hostname– Connect to a remote server.scp file.txt user@remote_host:/path/to/destination– Copy files securely.ssh-keygen– Generate SSH keys.ssh-agent– Manage SSH keys securely.
Troubleshooting SSH Issues
Even with proper setup, SSH connections may encounter issues. Below are some common problems and their solutions:
Connection Timeout
If you experience connection timeouts, check the following:
- Ensure the server's SSH service is running.
- Verify network connectivity between your Mac and the server.
- Adjust the server's SSH configuration to increase timeout settings.
Permission Denied (Public Key)
This error typically indicates a problem with your SSH keys. Double-check the following:
- Ensure the public key is correctly added to the server's authorized_keys file.
- Verify file permissions on the server's
.sshdirectory and files.
Advanced SSH Configurations
For users seeking more control over their SSH setup, advanced configurations can unlock additional functionality. Below are some advanced tips:
SSH Tunneling
Create secure tunnels to access internal services:
ssh -L local_port:destination_host:destination_port user@remote_host
SSH Config File
Streamline your SSH setup by configuring the ~/.ssh/config file. Add entries like:
Host myserver
HostName remote_server_address
User username
Conclusion
Learning how to use SSH remote on Mac for free can significantly enhance your ability to manage remote systems securely and efficiently. From setting up SSH keys to troubleshooting common issues, this guide has provided a comprehensive overview of the protocol's capabilities and best practices.
We encourage you to apply the knowledge gained from this article and explore the full potential of SSH on your Mac. For further reading, consider exploring advanced topics such as SSH multiplexing and certificate-based authentication. If you found this guide helpful, please share it with others and leave a comment below with your thoughts or questions.